Welcome to my world!
Hi! I'm Teresa. I'm a wife, mother, grandmother, retired emergency room nurse. I cook, clean, sew, quilt, craft, garden, preserve, diy and help homeschool my grandchildren. Welcome to my world!
Comfort and Joy

The holiday season has become such a hectic time of year for most of us. This is just a reminder to slow down and enjoy the little things.


UGH! It's time to clean up this mess.
Creating a fresh look with no money
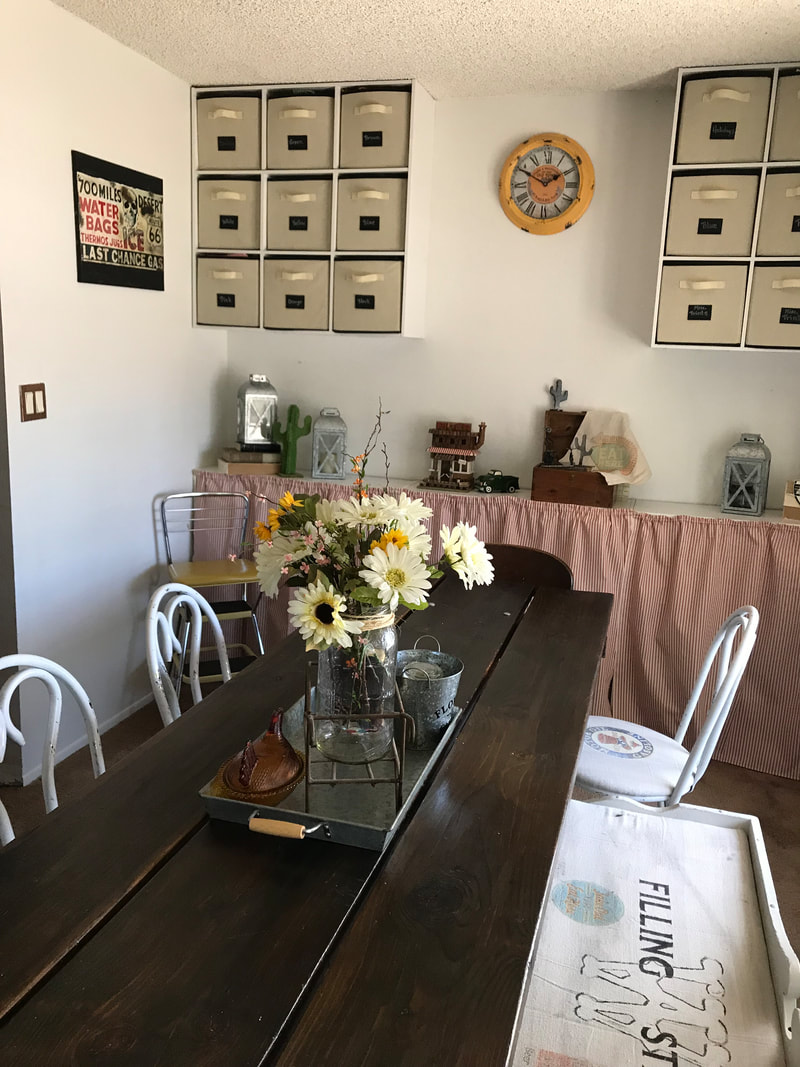
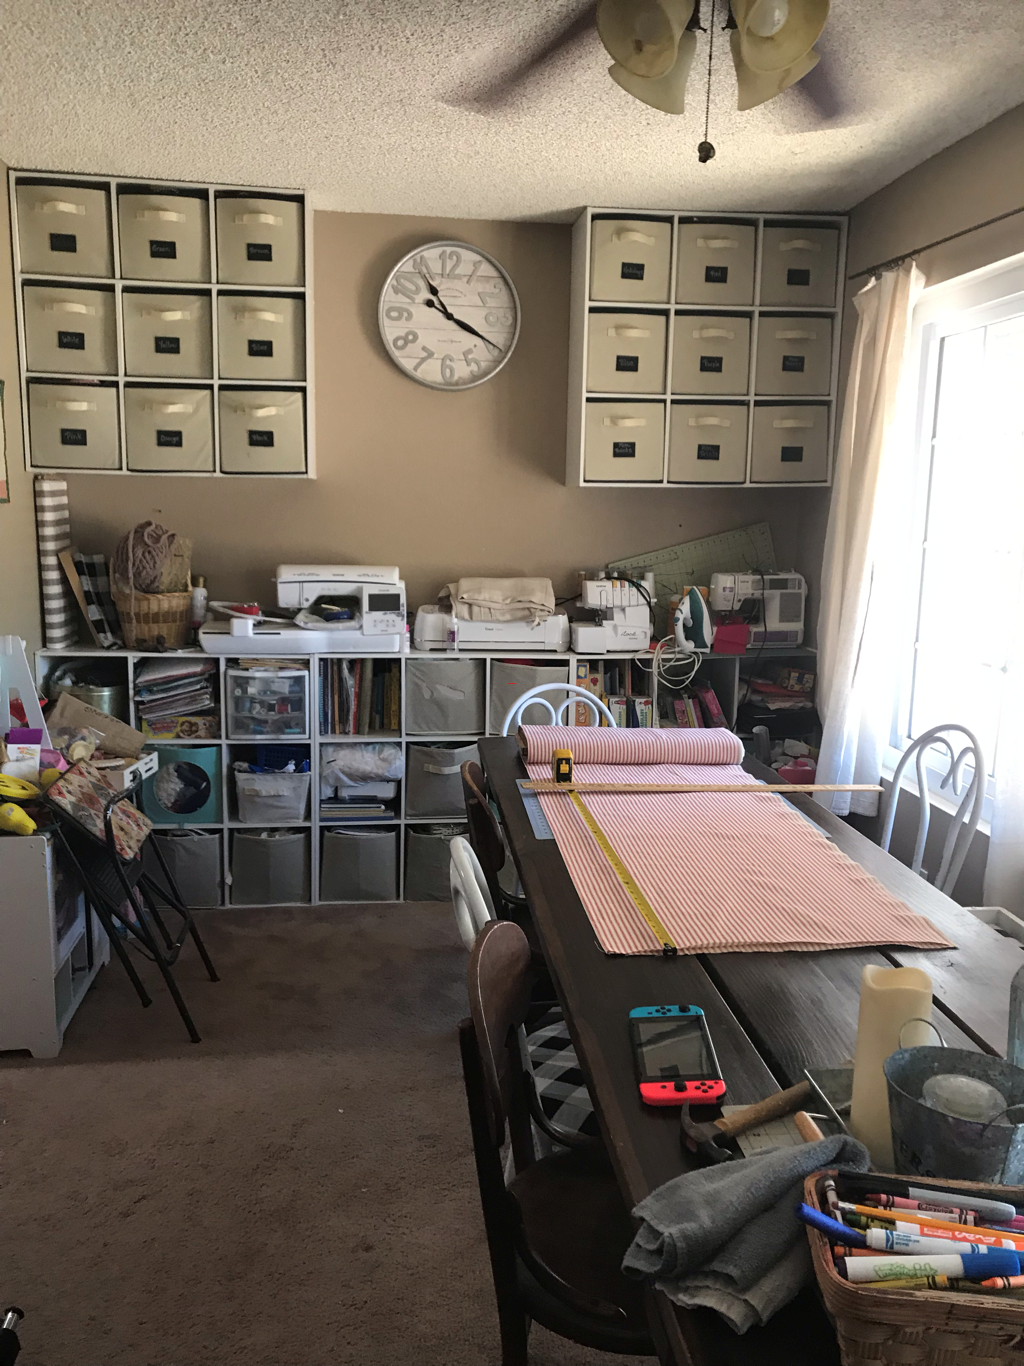
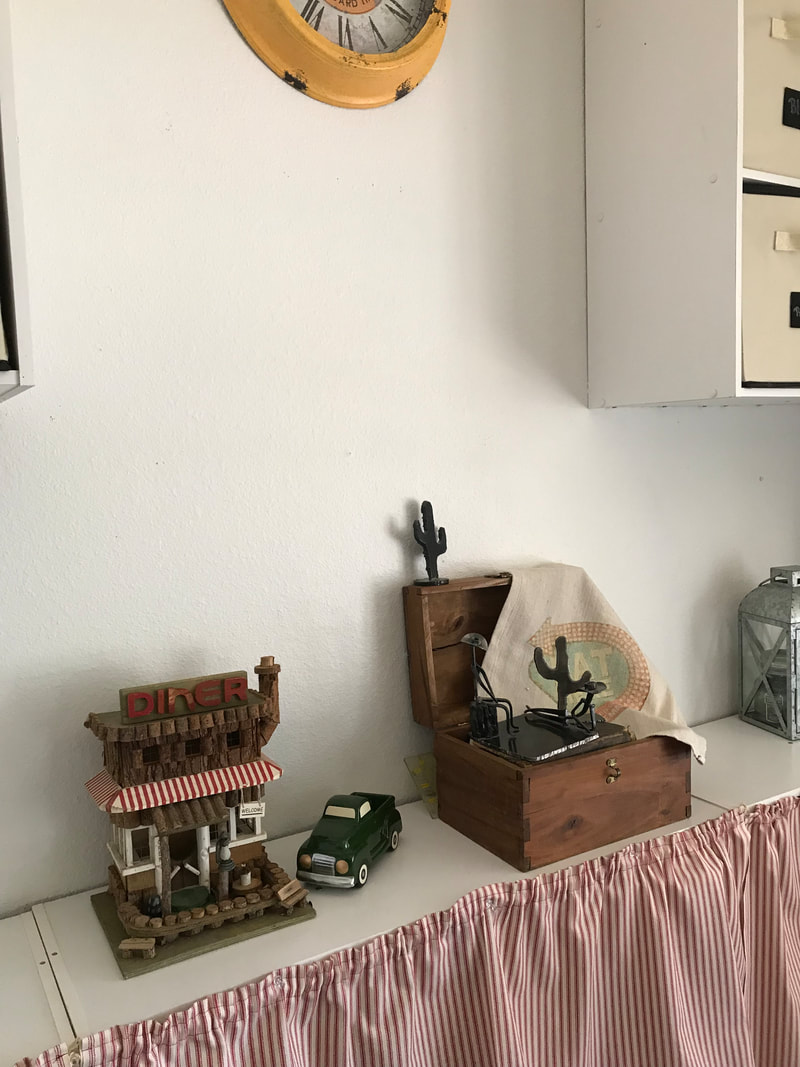
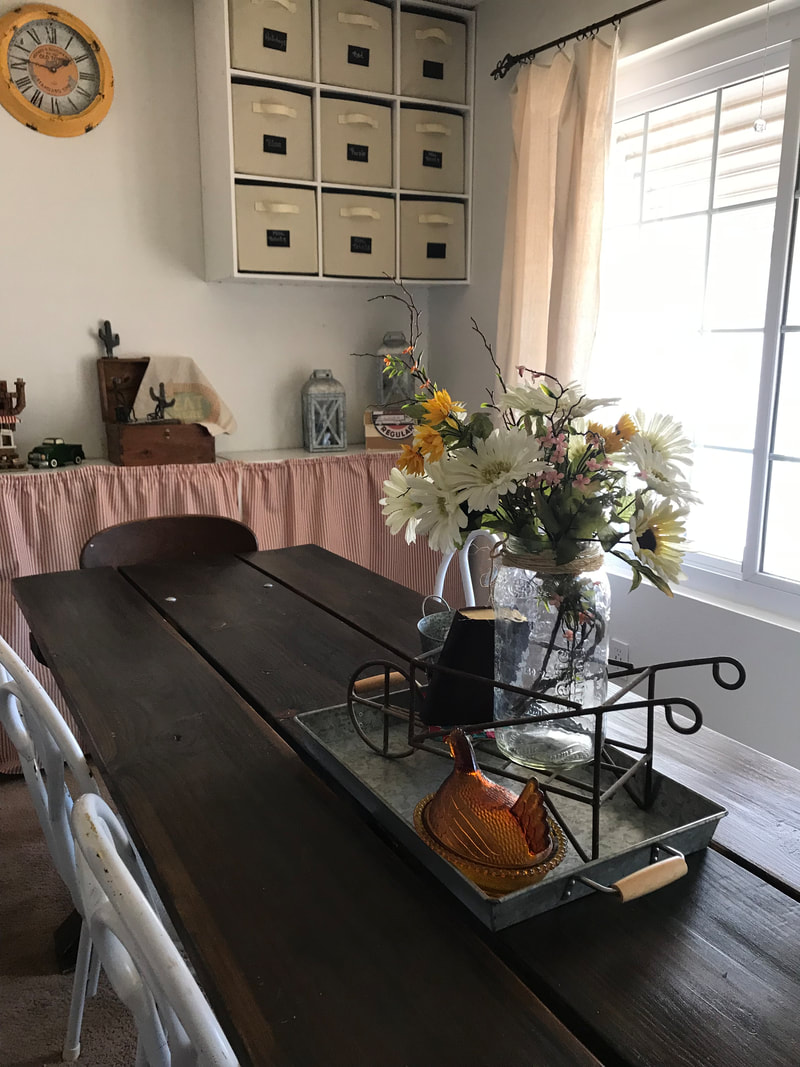
This is our dinning room. It is used as a multipurpose space where we craft, sew, homeschool, play, eat and whatever else. When walking into our front door this is where your eyes are drawn too. We plan on remodeling our home but it's not currently in our budget, so a freshening up is in order. We're gonna show you what we did without any money out of pocket.
The first thing we did was clear out what we could and hide what we couldn't. We washed the walls and applied a fresh coat of white paint. The paint was left over from a previous project. The next thing was to hide the contents in our cubbies. There were several solutions to this, but they all cost money. The solution we chose was red and white ticking fabric curtains, We already had the fabric in our fabric stash, so this solution would mean no money out of pocket. The curtains were very simple. I measured the cubbies. They measured 36" x 36" , I then added and inch to the bottom length for a hem and 2 inches to the top for a casing to pull twine through. I then cut the fabric 39" and did some sewing. The width of this particular fabric was already 46 inches wide, and I felt it was just enough for a slight gathered look. The ends of the fabric had a nice salvage, which I liked, so no sewing was needed there. To hang the curtains twine was pulled through the casing and push pins were used to secure the curtain to the cubbies.
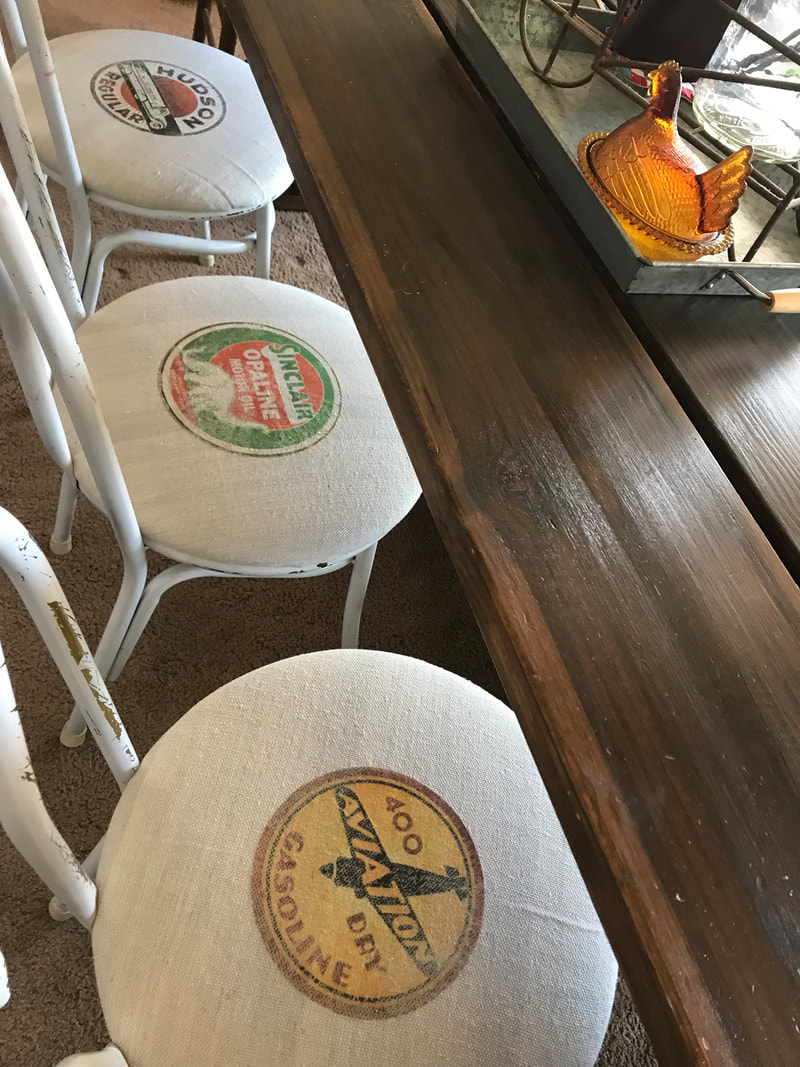
The next thing we decided to tackle was the chairs and bench top. Again looking through our fabric stash we decided on some painters cloth. This was our cheaper option if we were to replace it later. This was another easy task. All we needed to do was remove four screw on the bottom of the chair base. Cut the fabric slightly larger than the seat, staple the fabric to the bottom of the seat, screw the seat back to the chair base. Repeated the same steps to the bench top. We then used some iron on transfer we found during our cleaning to dress up our cushions.
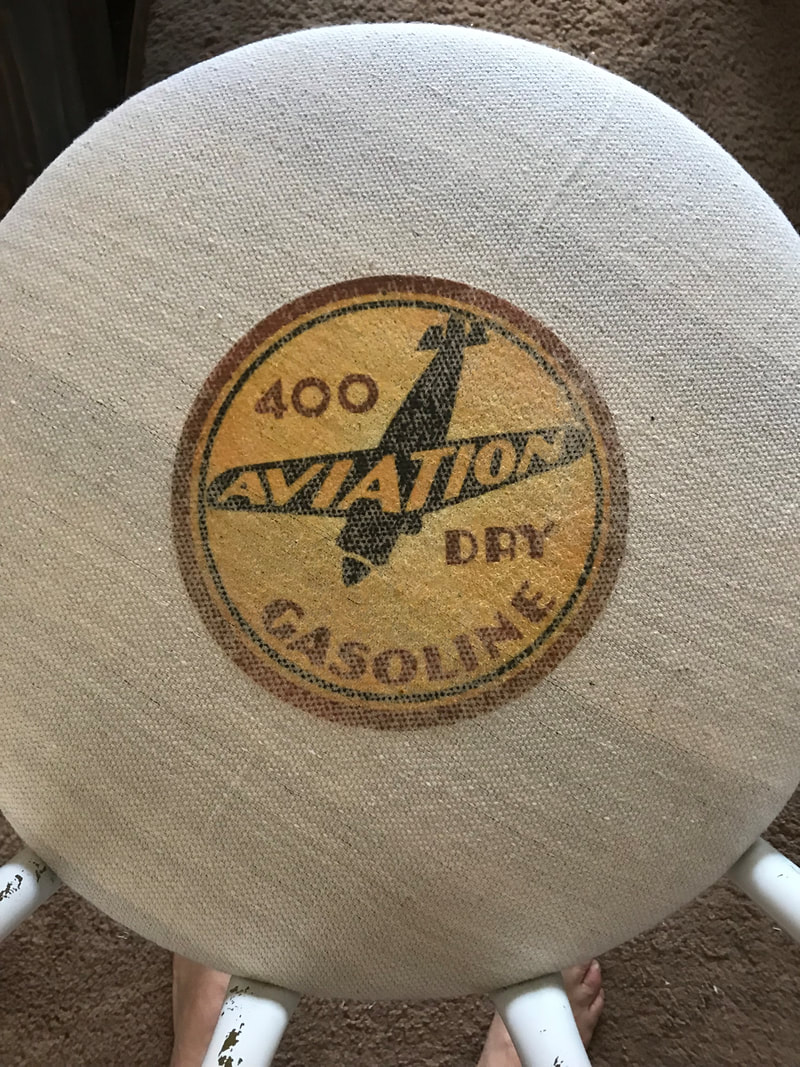
We chose some retro gas signs, printed them off onto the transfer paper, and then ironed them on.
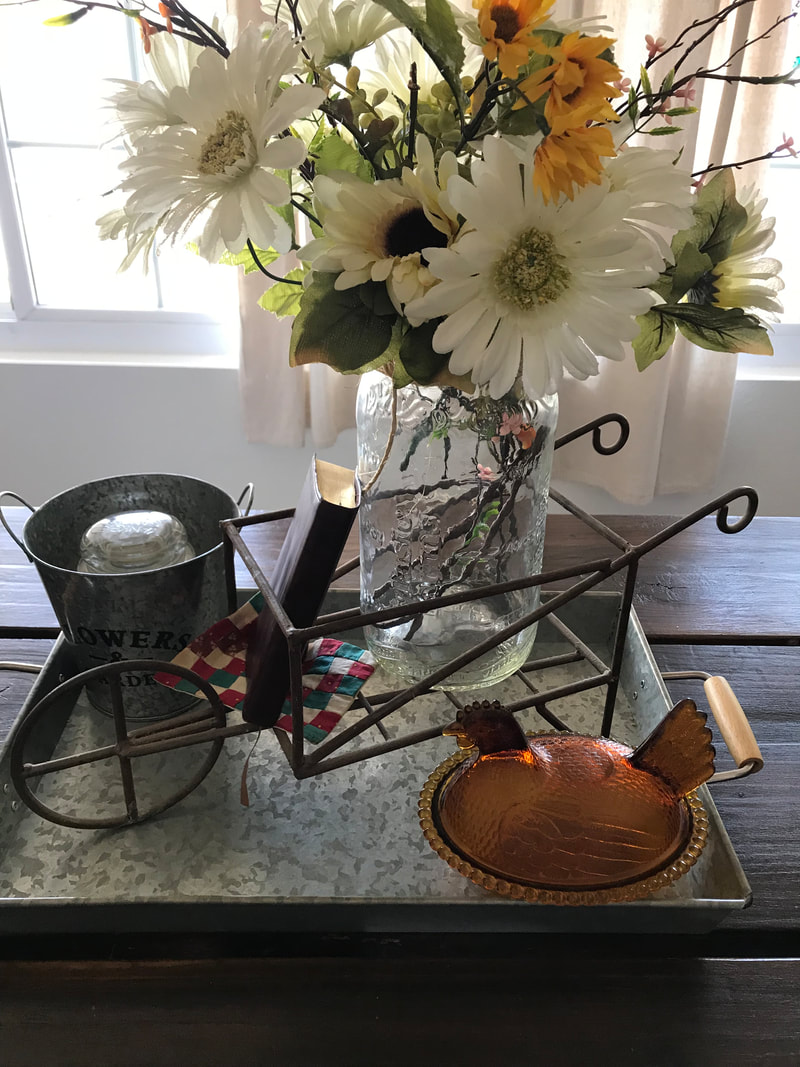
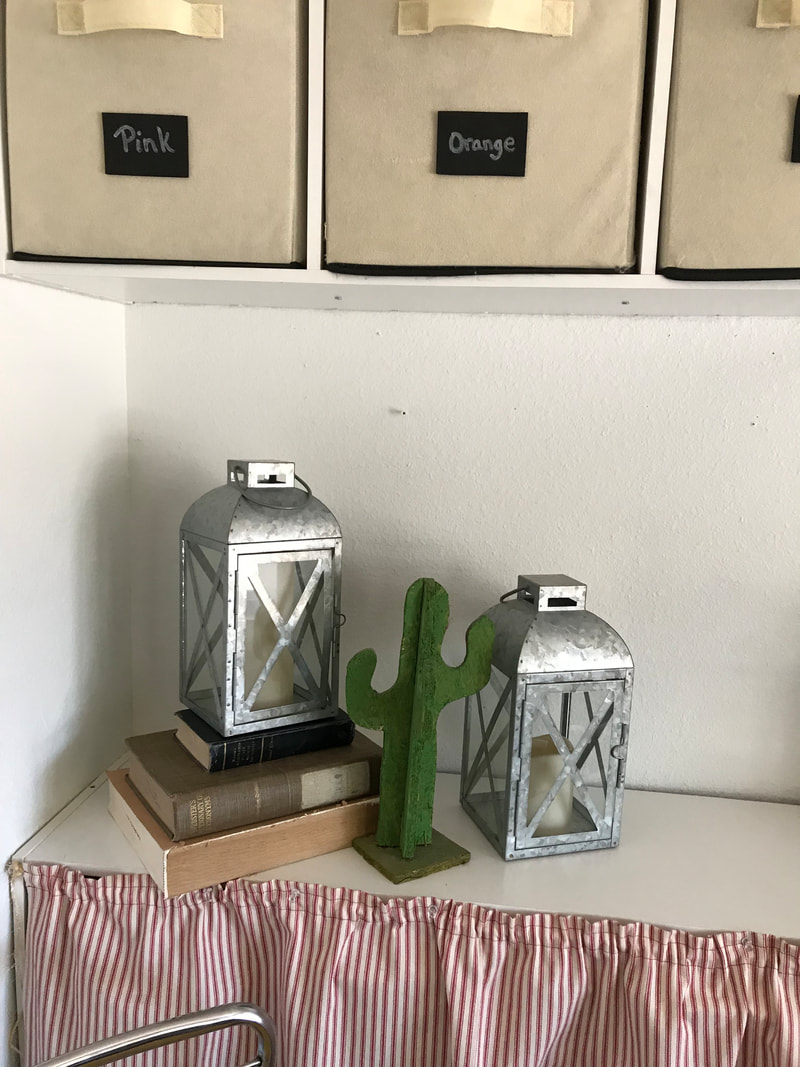
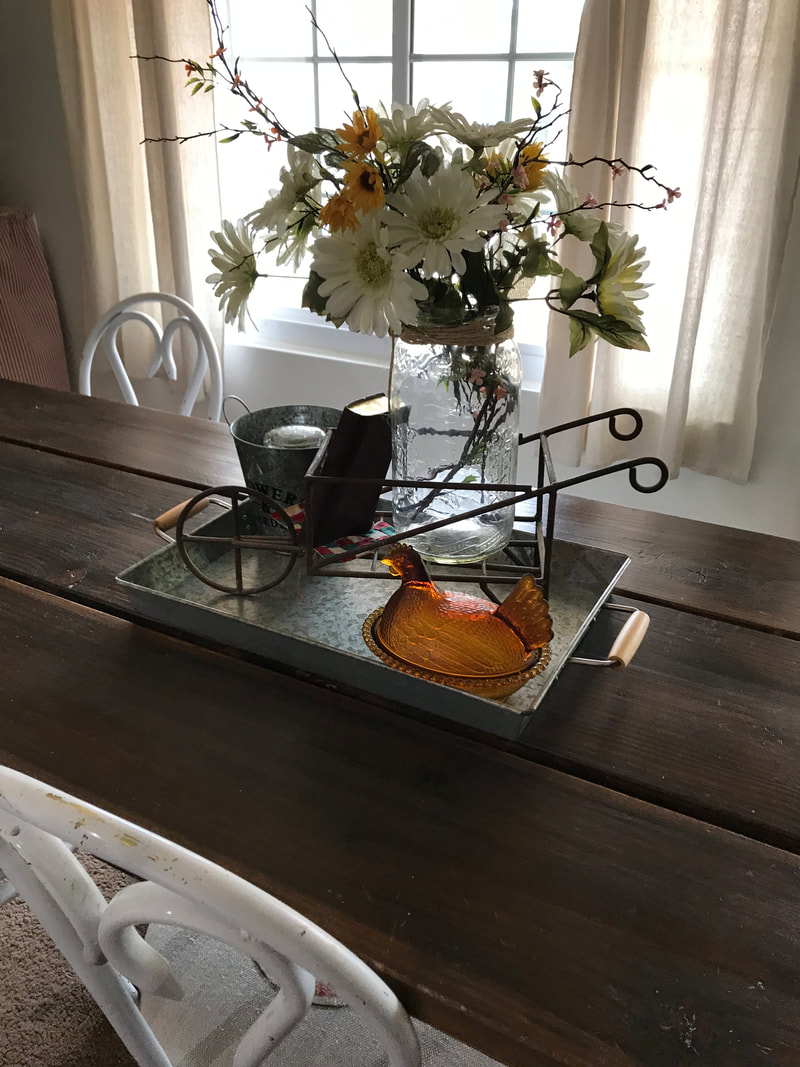
Now it was time to choose some décor. We were going to use the same clock we already had, but it got broke during our cleaning and painting. I had purchased a clock several months back for our kitchen. Although it was a nice addition to the décor, the practicality wasn't there. The decision was to move it to the dining room where it would be used. We used old books for the staggering effect of the lanterns, and an old bird house was brought in from the patio. My husband does metal art and we displayed some of his earlier art pieces, Found an old wooden box and ceramic retro truck lying around also to display. We ironed a retro diner sign onto a piece of the painters cloth and arranged all these things on top of the cubbies. The table centerpiece consists of a galvanized tray, galvanized bucket, rusted old flower cart, upcycled pickle jar filled with flowers from previous décor, old bible and retro chicken candy dish. Finally, we have a fresh look we were looking for, with no money out of pocket and still function as we need it to.
The first thing we did was clear out what we could and hide what we couldn't. We washed the walls and applied a fresh coat of white paint. The paint was left over from a previous project. The next thing was to hide the contents in our cubbies. There were several solutions to this, but they all cost money. The solution we chose was red and white ticking fabric curtains, We already had the fabric in our fabric stash, so this solution would mean no money out of pocket. The curtains were very simple. I measured the cubbies. They measured 36" x 36" , I then added and inch to the bottom length for a hem and 2 inches to the top for a casing to pull twine through. I then cut the fabric 39" and did some sewing. The width of this particular fabric was already 46 inches wide, and I felt it was just enough for a slight gathered look. The ends of the fabric had a nice salvage, which I liked, so no sewing was needed there. To hang the curtains twine was pulled through the casing and push pins were used to secure the curtain to the cubbies.
The next thing we decided to tackle was the chairs and bench top. Again looking through our fabric stash we decided on some painters cloth. This was our cheaper option if we were to replace it later. This was another easy task. All we needed to do was remove four screw on the bottom of the chair base. Cut the fabric slightly larger than the seat, staple the fabric to the bottom of the seat, screw the seat back to the chair base. Repeated the same steps to the bench top. We then used some iron on transfer we found during our cleaning to dress up our cushions.
We chose some retro gas signs, printed them off onto the transfer paper, and then ironed them on.
Now it was time to choose some décor. We were going to use the same clock we already had, but it got broke during our cleaning and painting. I had purchased a clock several months back for our kitchen. Although it was a nice addition to the décor, the practicality wasn't there. The decision was to move it to the dining room where it would be used. We used old books for the staggering effect of the lanterns, and an old bird house was brought in from the patio. My husband does metal art and we displayed some of his earlier art pieces, Found an old wooden box and ceramic retro truck lying around also to display. We ironed a retro diner sign onto a piece of the painters cloth and arranged all these things on top of the cubbies. The table centerpiece consists of a galvanized tray, galvanized bucket, rusted old flower cart, upcycled pickle jar filled with flowers from previous décor, old bible and retro chicken candy dish. Finally, we have a fresh look we were looking for, with no money out of pocket and still function as we need it to.


Pondering
|
The other day our youngest daughter came over to discuss her bridal shower and wedding plans. Projects we'll share in future blogs. After hugs and hellos, she sheepishly asked if I would repair a broken zipper in a pair of shorts and lengthen a gauzy dress that had shrunk. "Of course," I told her.
Today as I'm planning these fixes. I'm remembering as a teenager asking my mom to take up a pair of jeans. This request was made at bedtime. I wanted to wear these jeans the next day. Never did I consider all mom had already done that day, or that she may be exhausted. She did this without hesitation. This alteration wasn't done by a sewing machine. It was done by hand with needle and thread. Have you ever sewn denim by hand? Can I just say, "torture." Then the next day I would decide to wear something else. She wouldn't say a word or show any signs of disapproval. Shame on me!!! I'm not say my daughters request compared to mine. Repairing the zipper and adding some fringe to the bottom of her dress are quick and easy fixes. I'm just thinking of all the things my mom has done, without the appreciation she deserved or ever expected. Can if just say, "Thank you mom for everything." |